Showing posts with label tutorial. Show all posts

Sunday, October 21, 2012

How to Make a Fabric Necklace

Do you have some special fabric at home?  Maybe you still have a small piece of your baby blanket, maybe you kept one of your child's favorite shirts, maybe you have your grandfather's favorite handkerchief he used to tuck into his Sunday suit...

I developed a way to make simple fabric necklaces using these special bits of fabric.  My grandmother was quite the quilter in her day!  She hasn't quilted in years but she saved some tiny quilting squares that had been cut but never made it into a quilt.  I didn't know what to do with them but I knew I couldn't throw them away!


I sell kits to make these necklaces out of your own fabric.  The kits include instructions and some of the hard-to-find materials.  I thought it was time to share the instructions with you all!

Gather your materials and let's get crafting!

pendant, necklace chain, interfacing, and sponge come in the kit

Materials:

                pendant tray
                necklace chain
                fabric interfacing
                cosmetic sponge            
                fabric
                glue (I recommend Aleene’s Clear Gel Tacky Glue)
                clothing iron and ironing board
                scissors


Full instructions after the jump.

Friday, October 19, 2012

Friday DIY: Five DIY Office Organization Ideas

Hello!  Welcome to another edition of Friday DIY.  Some of my favorite DIY projects have been ways to organize my home, office, and craft storage.  I hate spending a lot of money on organizers so here are a few ideas to DIY your own organized space!
via
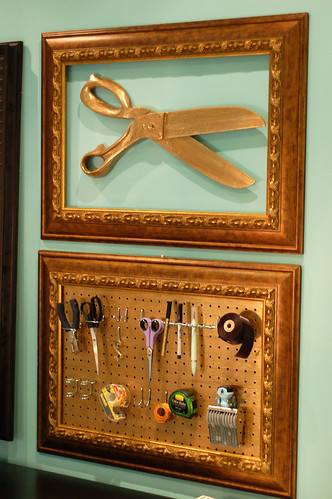
Brooklyn Limestone created a beautiful way to use peg board in your office.  This would look great as a jewelry organizer, too!

via
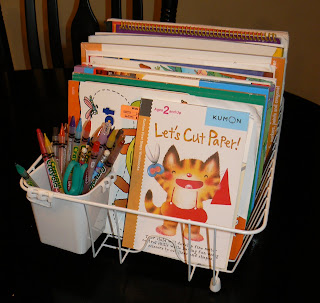
Head to the Dollar Store and pick up a dish rack to organize sketch books, scrap paper, binders, and coloring books.  Love this easy organizing idea from Mrs. Jones!

via

I live in a very small house and I'm here to tell you that going vertical with your storage is a major space-saver!  One Creative Housewife came up with a simple solution for organizing family activities.  I really like the black and white theme - it makes the center look so much more organized!

via
Real Simple is a great destination for all things organization.  I love this simple idea to improve the look and function of magazine holders.

via
Head to your local thrift store to pick up a wine rack and quickly turn it into a vertical (and moveable!) desk organizer.  Thanks to My C.A.S.E. Studies for such a simple DIY!

Didn't find what you were looking for in this round up?  Pinterest is a great resource for organization ideas!  You'll find some pretty complicated tutorials on Pinterest but you'll also find some super easy ideas you can do with items you already own!

Friday, October 05, 2012

Friday DIY: 4 DIY Scarves

Hello!  Welcome to another edition of Friday DIY!  We have our first real cold snap of the season here and I have my mind on scarves.

via
Making Lemonade wrote up a great tutorial for turning two t-shirts into this great braided scarf!

via
Look at this great lace-tipped jersey scarf from Sea lo que sea!

via
Look at this great scarf with fringe!  It looks easy to make and it has a great, bold look!

via
You'll need your sewing machine to make this lovely ruffled scarf.


- - - - - - -


Enjoy your weekend!  As always, if you make any of these DIYs, I'd love to see them!  Just post a link in the comments or e-mail a photo to kibbles.n.knits (at) gmail (dot) com.

Interested in seeing more Friday DIY?  Click here.  

Saturday, September 29, 2012

Mobile in a Bottle


I made this bottle quite a few months ago.  I was toying around with some beads and made a moving mobile inside a small glass bottle.  The bottle is about two inches tall.  I love it.  I made a few more but none were quite as wonderful as this one.

I have placed this little bottle in different places all around my house.  It looks great on a window sill!

Want to make one of your own?  You need minimal materials and I'm guessing you can figure out how to make it by looking at the picture.  Play around and have fun!

MATERIALS:
artistic wire (I used 22 gauge)
beads
bottle
cork to fit bottle

Monday, September 24, 2012

DIY Inspiration

I joined up with two link parties this week.  These are FULL of DIY inspiration and all you crafters should check them out.

I linked two different tutorials at two different parties so there will be LOTS of ideas from other bloggers!

original post here
I linked up my Kids' Art Gallery to the Mad Skills Party.  I've participated in this link party before - it's a treasure trove of ideas for everything from food to decorating to clothing.

original post here
I linked my headband tutorial to Classy Clutter's Saturday Spotlight.  This is my first time participating in this link party.  I look forward to checking out everyone's projects!

Sunday, September 23, 2012

Website Recommendation: One Pretty Thing

Have you checked out the amazing treasure trove of DIY that is One Pretty Thing?  Rachel collects on-line DIY tutorials like nobody else.  Her website is clean and easy to navigate.  She posts at least one roundup each day and it's easy to search for old roundups.  Here's what one looks like:

via

Keep in mind, this is just a screen shot!  This one Outdoor Roundup has two more rows of links!  It's DIY heaven!

Friday, September 21, 2012

Friday DIY: Four Cake Pop Tutorials

Hello and welcome to another edition of Friday DIY This edition is inspired by my sweet tooth!  Have you ever made cake pops?  I have made them for my birthday the past few years (maybe 3 years).  My kids love making them with me!  I love eating them - they are small but pack a mighty flavor.

via
When it comes to cake pops you MUST start with Bakerella.  She is the absolute guru when it comes to cake pops.  She made this collection of cake pops inspired by The Lorax movie.  Aren't they incredible?  She has basic instructions to get you from simple to very complicated.  And, her photography is so enticing!  (Get it?  ICING?!!  Sorry.)

via
How about these golf ball cake pops from 1Fine Cookie?

via
Are you looking to take your cake pop making to the next level?  Well, Strawberry Chic came up with an unbelievable design for Spring Flower Cake Pops.

via
These Sparkle Cake Pops would impress even your youngest guests at a birthday party, baby shower, wedding, or anniversary party.  They look simple to make, too!

Friday, September 14, 2012

Friday DIY: Four DIY Curtains

Hello and welcome to another edition of Friday DIY This edition is inspired by the changing light here in Minnesota.  The sun is at such an angle that we are getting bright, blinding light through our windows.  Personally, I'm soaking it all up in anticipation of a long, dark winter.  But, sometimes, you have to block the sun or you'll go blind.


via
I LOVE this idea from Involving Home for no sew roman shades!  She mentions wanting to add a liner on the back so the shades look better from outside the house.  I agree with her on that, and it shouldn't be too hard to add a simple backing using the same instructions.  This DIY is going on my to do list.


via
This tutorial not only shows you how to make your own curtain rod, but she also describes how to make easy faux pinch pleats on the curtains themselves.  


via
Head over to Jacqueline Zinn to see three ideas for curtains to put up in a teenager's room.  These aren't tutorials but they are inspiration!  


via
I love the bold look of these black and white striped curtains.  Aren't they fabulous?

My windows have been bare a long time and looking for these tutorials really inspired me to work on the windows!


- - - - - - -


Enjoy your weekend!  As always, if you make any of these DIYs, I'd love to see them!  Just post a link in the comments or e-mail a photo to kibbles.n.knits (at) gmail (dot) com.

Interested in seeing more Friday DIY?  Click here.  

All photos and tutorials are property of original owners.  I did not write these DIYs or take these photos.  I collect DIYs and pass them on to you!

Friday, September 07, 2012

Friday DIY: 4 ideas for crafts related to children's books

Hello and welcome to another edition of Friday DIY Sorry I wasn't here last week.  Finishing up my summer classes and writing the syllabi and assignments for my fall classes used up all my free time over the past weeks.

This edition is inspired by the beautiful children's books I have read to my children over the past years.

via

Craftoart created this thumb print freight train to go along with one of her daughter's favorite books.

via


Or what about making this cute little fly so your children can act out some new endings to Tiny Little Fly.


via
Make some Truffula trees pencils to match Dr. Seuss's The Lorax.

via
Just look at this amazing glow in the dark craft from Reading Confetti.  She created this craft to go along with The Very Lonely Firefly by Eric Carle.  Before you go, you must click  this amazing list of activities to match books.  Reading Confetti put together quite a collection!


Enjoy your weekend!  As always, if you make any of these DIYs, I'd love to see them!  Just post a link in the comments or e-mail a photo to kibbles.n.knits (at) gmail (dot) com.

Interested in seeing more Friday DIY?  Click here.  

All photos are property of original owners.  I did not write these DIYs or take these photos.  I collect DIYs and pass them on to you!

Friday, August 24, 2012

Friday DIY: 5 DIY Paper Ideas

Hello and welcome to another edition of Friday DIY This edition is inspired by the imminent start of school.  Schools are full of paper!  Here are some fun things to make with paper:

via
I love this idea for making your own pads of paper from Practically Functional.  I would make these using all the paper that's only been printed on one side - great way to reuse all that paper!

I think kids would love making pads of paper from construction paper, drawing paper, even junk mail!  You could make them in different shapes and crazy colors.  This would also be a good way for kids to make their own story books!

via
And what about these adorable paper earrings?  Dollar Store Crafts does it again!  The only change I would make to this tutorial is that I would attach the paper beads to thin chain instead of thread.  I think the thread would get caught up in your hair.

via
Turn ordinary string lights (AKA Christmas lights) into beautiful paper lanterns with this tutorial on Instructables.

via
Use beautiful pictures of world-wide destinations to make your own light up paper village.  FellowFellow  put together this creative tutorial and it took the internet crafty world by storm this past winter.  Start collecting your magazine photos, now.  The days are getting shorter...


And, for the grand masterpiece of them all...The paper pendant lamp from Meg Allan Cole.  Seriously, you could take this in so many directions.  What about using parchment paper for a diffused look (and it could handle higher temperatures)?  What about adjusting the paper around a wire cage to keep it even farther away from the bulb?  What about paper doilies wrapped and layered?


Enjoy your weekend!  As always, if you make any of these DIYs, I'd love to see them!  Just post a link in the comments or e-mail a photo to kibbles.n.knits (at) gmail (dot) com.

Interested in seeing more Friday DIY?  Click here.  

All photos are property of original owners.  I did not write these DIYs or take these photos.  I collect DIYs and pass them on to you!

Monday, August 20, 2012

Kids' Art Gallery


Kids get a real boost in their feelings of success at school when their work is displayed in classrooms and in their homes.  I'm sure you remember how it felt when an adult set aside some wall space for your own projects.


When kids decide which pieces of work are the best or most important (or just their favorite), they learn to evaluate their own work.  They learn to see what is amazing in their own work without needing the praise of an adult to know.


I made some spots in my children's room for them to post their own projects.  It's easy to do!

Materials:

hammer
nails
scissors
ribbon or yarn
clothes pins

All you need to do is nail the nails into the wall and then tie the ribbon or yarn to the nails!

Kids can use the clothes pins to put up their own art.  The clothespins make it really easy for kids to rearrange, switch out, and display their own work.

Friday, August 17, 2012

Friday DIY: Five DIY Earrings

Hello and welcome to another edition of Friday DIY Today's edition is all about making your own earrings.  They are easy to make with a few simple tools and materials.


What about making these lovely feather earrings out of leather?  La bella ironia wrote up an easy-to-follow tutorial.  This tutorial would also work with felt feathers, wouldn't it?


Or, what about these cutie-patooties?  Using tiny wooden dots and your own nail polish, you can make these super stylish earrings.  In Honor of Design created a tutorial that is not only easy to understand but also lovely to look at!


And, how about these beautiful button earrings?  These are a Few of My Favourite Things blogged about them.  Check out her blog for more simple tutorials.


These floss-wrapped hoops come from Delighted Momma.  Do you have any earrings that are starting to lose their finish or plating?  You know what I mean - they are pitted and discolored.  Maybe they are a cool shape but the finish is looking ugly.  Wrapping them using this technique would be a great way to save them from the trash!


Can you believe this earring is made of paper?  Etcetorize wrote up this tutorial for DIY paper earrings.  They look easy to make!


I hope you have a crafty weekend!  As always, if you make any of these DIYs, I'd love to see them!  Just post a link in the comments or e-mail a photo to kibbles.n.knits (at) gmail (dot) com.

Interested in seeing more Friday DIY?  Click here.  

All photos are property of original owners.  I did not write these DIYs or take these photos.  I collect DIYs and pass them on to you!

Friday, August 10, 2012

Friday DIY: Five School Supplies DIYs

Hello and welcome to another edition of Friday DIY


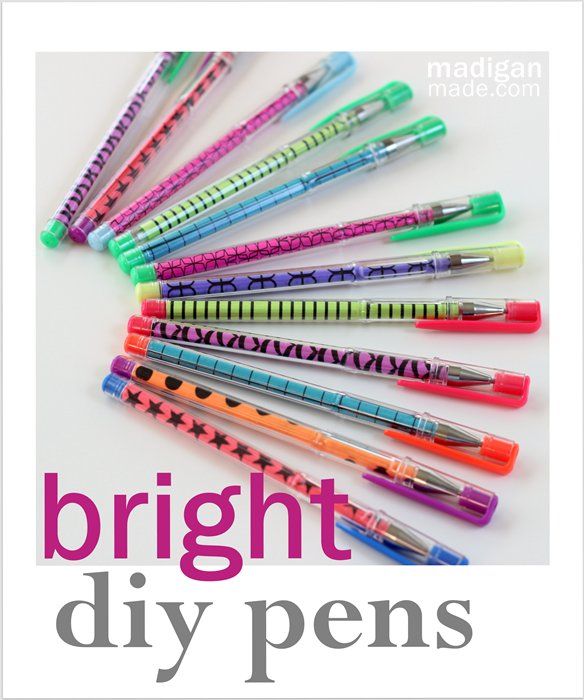
This DIY pen tutorial from Madigan Made was the inspiration behind today's theme.  Aren't they fantastic?  These would be easy to make and I'm sure kids (especially teens) would love to make their own.  


And, if your kids need pencils, you could make these sweet pencil toppers.  These are made out of canvas but you could make them out of felt and embroider the design.  

Let me just add - there are a lot of really cute pencil topper DIYs out there.  But, they cover up the eraser!  Kids need their erasers.


And here's an easy tutorial for making a pencil case you can use on its own or 3-hole punch to keep it in a binder.  I looked through a lot of tutorials trying to find a really easy one.  This is by far the easiest as it doesn't involve zippers or velcro.


What about making your own post-it bookmarks?  These would be especially great for older students who are learning to annotate informational texts.


And, if you want a much bigger project...Check out the amazing Sew, Mama, Sew for a backpack tutorial.  


Enjoy your weekend!  As always, if you make any of these DIYs, I'd love to see them!  Just post a link in the comments or e-mail a photo to kibbles.n.knits (at) gmail (dot) com.

Interested in seeing more Friday DIY?  Click here.  

All photos are property of original owners.  I did not write these DIYs or take these photos.  I collect DIYs and pass them on to you!


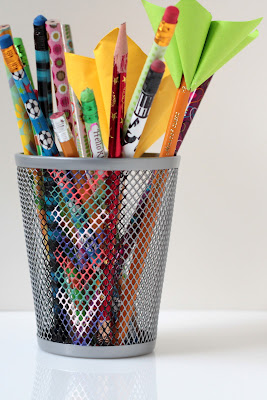
But wait!  This week there is BONUS DIY!  I have two tutorials on Kibbles 'N Knits that are school supply related.  Check out the DIY chevron pencil cup:


Monday, August 06, 2012

Crafting with Kids: Fairies

Or as my kids have taken to calling them, Twillerbees.


We get Highlights Magazine at our house and we love the crafting pages!  This month's crafts are outstanding!  My kids saw these little fairies and had to make them right away.  We've already might six and we are still going.


We've been using toilet paper cardboard tubes and pine cones for the bodies but I'm sure you could use just about anything!  All you need to do is gather some twigs, weeds, leaves, flowers, etc. from your yard and start creating!  

We've used yarn, tape, and paper clips to keep the "nature" on the cardboard tubes.  Experiment with what works best for you.

Then, you hide them around your yard because they are, after all, fairies.


We have spent hours making them and playing with them.  They each have a role to play to keep our backyard beautiful.  There's the vine fairy, the watering fairy, the tomato fairy, etc.  I hope your kids like them as much as mine!